There's no easy way to say this, I've spent a small fortune on my racing.
What's more, I've limited my options somewhat, with no more PS4 racing (*sniff*). Actually, I'm not so worried about that - the games I rated on there, PCars2 and Assetto Corsa are both equally fine on PC, and the only way I'm going to miss GT Shart is if I take a shot at it.
Rollback to mid-year 2020, the year I suddenly had a lot more free time and a one-time paycheck that would cover a fairly fancy car... and like many, I went through the mill. Towards the end of the year I got myself together, found some work and more importantly got fed up with my G29's pedals.
I'll do an end-of-life review for my old G29, it won't be pretty not least as in the years I owned it I bought at least three of them. The final straw was the never-ending issues with throttle potentiometers, culminating with me angle grinding most of the casing out and like using easy start on some old banger, spraying contact cleaner in before every race night.
From there it wasn't a hard stretch to get where I ended up, I recommend using this list (without prices) on your other half to justify what's close on 1/2 a ton of gaming gear in the living room...
- Have a clearly inferior product.
- Justify new pedals that don't rely on potentiometers... that's the Fanatec V3 BTW.
- As you're doing new pedals, you need a new wheel.
- As you're doing Fanatec, might as well be them.
- You're only doing this once, so get a direct drive - DD1 < Cheaper than the DD2!
- You need a wheel. Any will do, but I opted for a Fanatec Porsche 918 rim, as I race sports and historic more than GT. Glad I did.
- Now you've got a DD wheel you need to mount it. TrackRacer's TR8020 is reasonably priced (LOL) and more to the point very configurable and extendable into the future.
- Oh yes, almost forgot... (use those words), I'll need a H pattern and sequential, Fanatec does a single unit for that, so that's a saving too!
That's how I ended up waiting for many boxes to arrive that had, all up:
- TrackRacer TR8020 frame
- TrackRacer mouse plate add-on
- TrackRacer digital dash add-on
- Fanatec DD1 base
- Fanatec Clubsport V3 pedals
- Fanatec Porsche 918 rim
- Fanatec H pattern shifter.
And a serious build exercise, which I'll dig into below. Before that, a very brief summary of what I've learnt through the build experience.
Must Do's:
I watched a review build on the TR8020, and they recommended getting a measuring/square tool thing, I'm sure there's a proper name for it, whatever. Anyway, these were essential tools:
The tape measure is a no-brainer. The socket drive with Allen key adapter was a godsend in the end (so many bolts!), the cutters are to nibble tabs off brackets (you're instructed to) and the blue thing is the fancy measuring thing - also highly important.
Another must do is to watch a few youtube vids of the build, there are a few out there including the official '10min quick start guide'. That's genius, as there is nothing quick about this build other than the realisation that it's going to take a lot of time.
Like me, you'll probably have a cold sweat moment over the lack of instructions. You can find them on the TrackRacer site. They're not great.
My 'rig' doesn't look like the one in the picture.
In fact, I don't think it ever could. The instructions aren't for the wheel clamp I have (for the DD1) and I struggle to see how the pedal plate lines up. The must-do out of all this - don't be afraid to set the frame to suit your situation.
Wheels... I bought wheels to move it around. In fact, I bought two sets, and have six wheels on my rig (EuroTruck anyone?) to spread the weight a bit. I'm glad I bought that many. And I can tell you I also hate those wheels. I must have fitted them half a dozen times - lining up stuff and making sure the spacer is in the right place. The advice here - experiment with one until it spins freely when mounted to its plate. Did I mention using a ratchet Allen key...
The last must-do. Learn to dislike the pedal plate set up with a passion. It's the last thing in the instructions... there's a light at the end of the tunnel. But it's a train coming the other way and it's the 'Over-engineering express' train, destination compromise via complex-city. I'll explain below.
The Build:
First post of my new sim-rig. Rate my sim rower!
Was still laughing at this point...
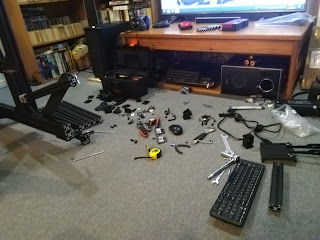
For posterity, this is the build space. Basically, I emptied out the TV room and made space on one side. The rig is on wheels so I roll it across on race (every) night.
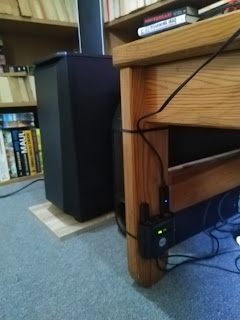
Little wins. I have a USB switch box, which allows me to flick headset and keyboard between PC and PS4 Pro. It used to flop around in front of a TV cabinet. No more, in fact, the cabinet is no more either...
Part of the exercise was to remove the old TV cabinet. Over a decade of fluff sat behind there along with a myriad of cables and 'too hard' to remove stuff.
Yes, that's twin subs, one active, one passive, both romp.
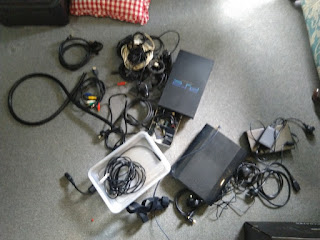
All this got pulled out from the old TV cabinet and behind. Colin Chapman would be proud.
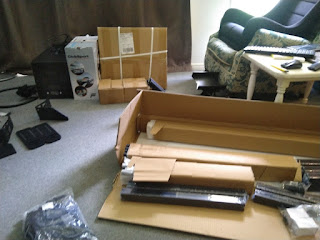
Obligatory box shot. F'ing heavy box shot for that matter.
This was the first box I opened, it is the dash holder - I have a 7" digital dash (old tablet).
This is when I realised that the TR8020 is over-engineered - somewhere there's an armoured car missing a side plate...
Built. I didn't use it like this in the end. The bottom holder is too big for a smaller keyboard. And the top one... well I took an angle grinder to that to get plug space.
Finally, the waldo arm affair... no. I just used one and some angle clamps to fit it to the frame, it's much simpler and not a meter away from me!
At this point I started opening boxes. Some bags are labelled some are not.
Scaffolding. Some covered, some not. It's a very inconsistent kit.
Manufacturing fail. The DD1 clamp was delivered with paint damage. I'm not surprised, I'm not certain but I think the paint is a black mist that the parts are passed through. You do need to be careful or you're going to have a beater of a rig...
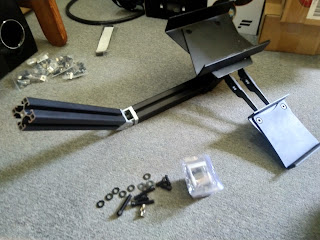
What makes up for the lack of paint is the amount of steel involved. This is for the DD1.
And it's all heavy-duty stuff.
Wheels. I hate you. I'm glad I have you. You hate me.
On a side note, if you're building this in your living room and you don't have these, good luck.
The amount of wheeling around I did as I worked on the frame, I'm not sure I could have built it without them. Hateful things. Also, brakes, why? No one has a slope in their living room!
The old adage, measure twice cut once is true.
The new adage, measure twice, fit thrice.
Fitting seat rails - measure the bejesus out of these or they won't work.
Also, note that you'll need to move them again anyway when you realise you've maxed adjustment after you've fitted the pedals. Measure twice fit thrice...
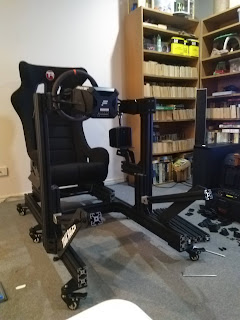
This is in fact a happy shot. For some reason fitting the wheel and chair felt like I was nearing the end of the build.
I wasn't.
In true over-engineering style, the shifter plate is on a heavy-duty adjuster plate. I'm tempted to pull that off and have it direct to the 8020 bar that's fitted. It doesn't wobble noticeably in use, but certainly, there is leverage to be had and feel in time.
Fitting (for the fist time) the pedal plate.
You become a man fitting these (several times).
I looked round and all the bits were nearly all used up. Amazing, and very satisfying, somewhat clouded by the tears of drained mojo (this was night three).
Fitted. Note that this is not the final form, I moved it all as the pedals were too high. The adjustment gubbins on the plate is tosh in my opinion. I'm sure it works, and it does allow for a shorter main frame. Except that really you're not going to be altering this very often. I'd have preferred a basic 8020 T-slot affair.
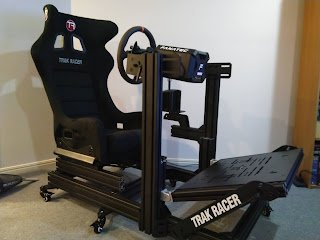
OMG it's actually built
Final form. Note that the pedal plate is now lower where it hinges.
That was a monumental effort to do. I also had to move the uprights (angles means lower is further away) and only just managed to get the diagonal parts to fit. There's no more adjustment.
In fact, I think at some point I'll buy some T-slot bars and convert to something altogether easier to setup.
The mouse mat is fitted too, not sure if that's how it's supposed to be done, I think possibly not (as I used dash parts), but it's perfect there like that and only a minor coincidence that beer will sit on there...
---
And that's it. Q&A Time:
Q: Would I do it again.
A: Not without someone to help, it was hard to hold, measure and tighten at the same time.
Q: Buyers remorse then?
A: Not at all. I skip past the cost and just enjoy driving so much more now.
Q: Comfortable?
A: Somewhat. When the pedals were too high it really wasn't. Lowering them and putting a thin cushion (not some epic lumbar roll) behind my lower back helps. And my back is stuffed from a few things. So I'd say ultimately yes.
Q: Do anything different in the build?
A: I'd do the base frame, then pedals then seat. Fit my pedals and get them right before the wheel frame etc. In this way, I think adjustment could have been easier to manage.
Q: Recommendations to TrackRacer?
1. The above point for the pedals.
2. Sell a six-wheel kit, not four.
3. Re-design the button/dash setup, it's too heavy and has no cable portholes.
4. Not sure any picture of a build I've seen works ergonomically. I'm not a freak (mostly) but my rig does not look like others with the pedals off out into the distance.
5. Pre-assemble the seat slider frame - it's the same for everyone and that's complexity that can be avoided.
Q: Of the Fanatec gear
A: All awesome, another post some time into the future...
----
And that's it for this post, a bit like finishing the build, huge, and ultimately something you stare at and wonder why you did it in the first place...
More posts on usage soon I'm sure.


